
Mybatis学习
参考:
【狂神说Java】Mybatis最新完整教程IDEA版通俗易懂
【狂神说Java】SpringBoot整合Mybatis框架】
SpringBoot整合Mybatis框架
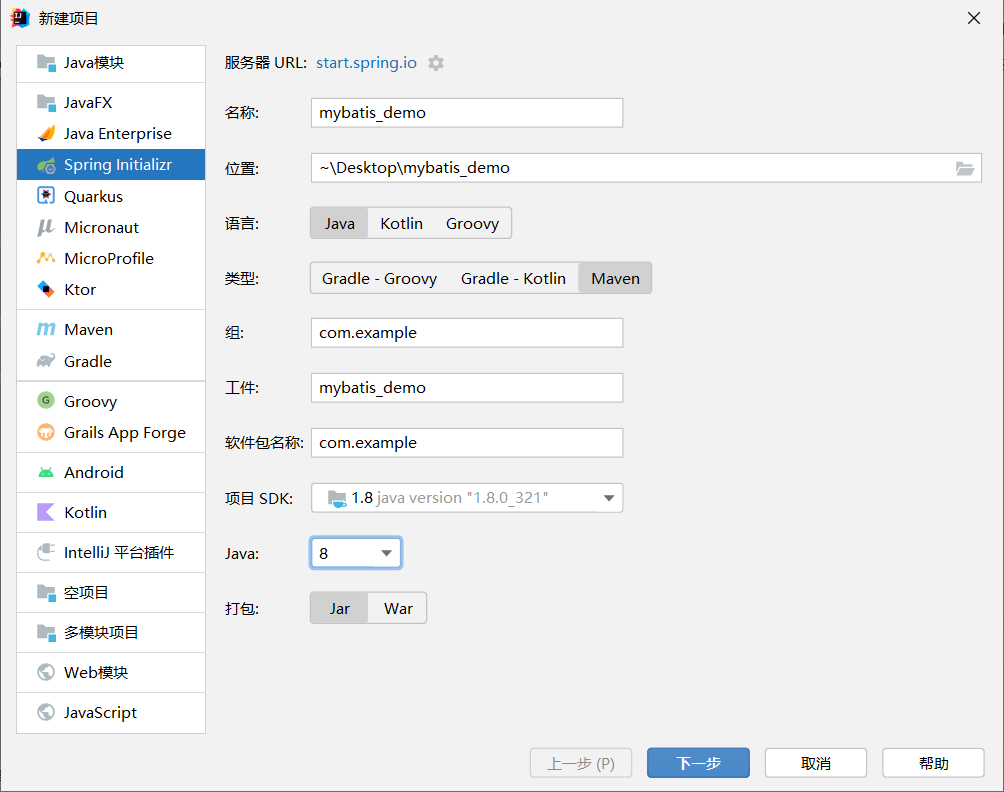
1 新建项目
新建项目,选择Spring Initializr
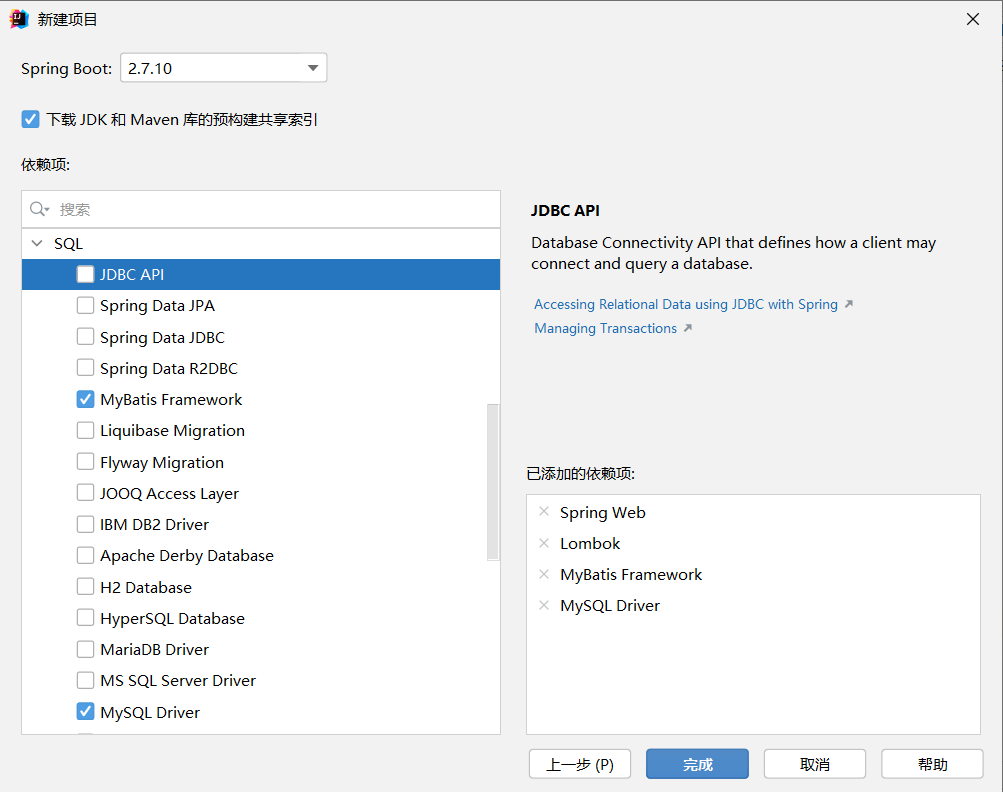
依赖项:勾上这些依赖,springboot最好选3.0.0以下的,否则会使用JDK17
2. 配置文件
修改resources目录下的application.yml(不知道为什么我这里用application.properties配置不上):
spring:
  datasource:
    username: root
    password: 123456
    #?serverTimezone=UTC解决时区的报错
    url: jdbc:mysql://{ip地址}:3306/{库名}?serverTimezone=UTC&useUnicode=true&characterEncoding=utf-8
    driver-class-name: com.mysql.cj.jdbc.Driver

mybatis:
  mapper-locations: classpath:mybatis/mapper/*.xml
  type-aliases-package: com.example.pojo
3. 测试数据库是否连接成功
修改test目录下的MybatisApplicationTests.java:
package com.example.mybatis;

import org.junit.jupiter.api.Test;

import org.springframework.beans.factory.annotation.Autowired;
import org.springframework.boot.test.context.SpringBootTest;

import javax.annotation.Resource;
import javax.sql.DataSource;
import java.sql.SQLException;

@SpringBootTest
class MybatisApplicationTests {

    @Resource
    DataSource dataSource;

    @Test
    void contextLoads() throws SQLException {
        System.out.println(dataSource.getClass());
        System.out.println(dataSource.getConnection());
    }

}
4. 创建com.example.pojo目录,创建实体类
com/example/pojo/User.java
package com.example.pojo;


import lombok.AllArgsConstructor;
import lombok.Data;
import lombok.NoArgsConstructor;

@Data
@NoArgsConstructor
@AllArgsConstructor
public class User {
    private int id;
    private String name;
    private String pwd;
}
5. 创建com.example.mapper目录,编写mapper接口,配置xml文件
com/example/mapper/UserMapper.java
package com.example.mapper;

import com.example.pojo.User;
import org.apache.ibatis.annotations.Mapper;
import org.springframework.stereotype.Repository;

import java.util.List;

@Mapper
@Repository
public interface UserMapper {
    List<User> queryUserList();
}
在resources目录下,创建mybatis/mapper/UserMapper.xml
<?xml version="1.0" encoding="UTF-8" ?>
<!DOCTYPE mapper
        PUBLIC "-//mybatis.org//DTD Mapper 3.0//EN"
        "http://mybatis.org/dtd/mybatis-3-mapper.dtd">

<mapper namespace="com.example.mapper.UserMapper">
    <select id="queryUserList" resultType="User">
        select * from user
    </select>

</mapper>
6. 创建com.example.service目录,创建服务层接口和实现类
service层这一步狂神教程里没有,结果新版本必须使用框架结构,导致卡了两天…
com/example/service/UserService.java
package com.example.service;

import com.example.pojo.User;

import java.util.List;
import java.util.Map;


public interface UserService {
    public List<User> userList();
}
com/example/service/UserServiceImpl.java
package com.example.service;

import com.example.mapper.UserMapper;
import com.example.pojo.User;
import org.springframework.beans.factory.annotation.Autowired;
import org.springframework.jdbc.core.JdbcTemplate;
import org.springframework.stereotype.Service;

import java.util.List;
import java.util.Map;

@Service
public class UserServiceImpl implements UserService {

    @Autowired
    UserMapper userMapper;

    @Override
    public List<User> userList() {
        return userMapper.queryUserList();
    }
}
7. 创建com.example.controller目录,创建controller
com/example/controller/UserController.java
import com.example.pojo.User;
import com.example.service.UserService;
import org.springframework.beans.factory.annotation.Autowired;
import org.springframework.web.bind.annotation.GetMapping;
import org.springframework.web.bind.annotation.RestController;

import java.util.List;


@RestController
public class UserController {
    @Autowired
    UserService userService;

    @GetMapping("/queryUserList")
    public List<User> queryUserList(){
        System.out.println("################################");
        List<User> userList = userService.userList();
        return userList;
    }
}
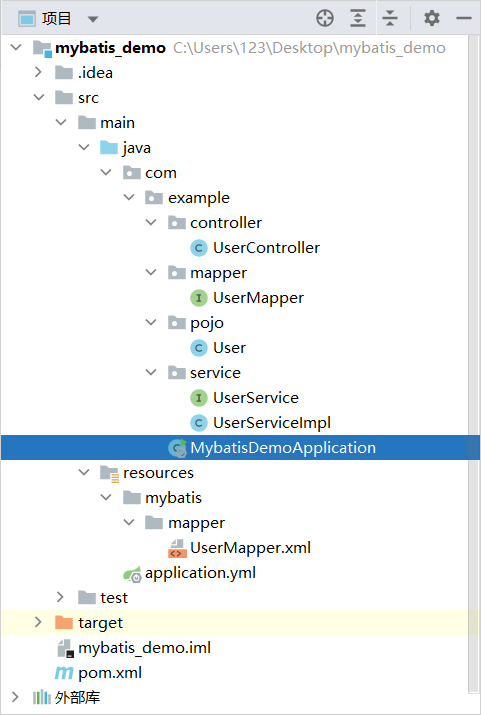
8. 项目结构
9. 运行结果

IDEA连接数据库配置
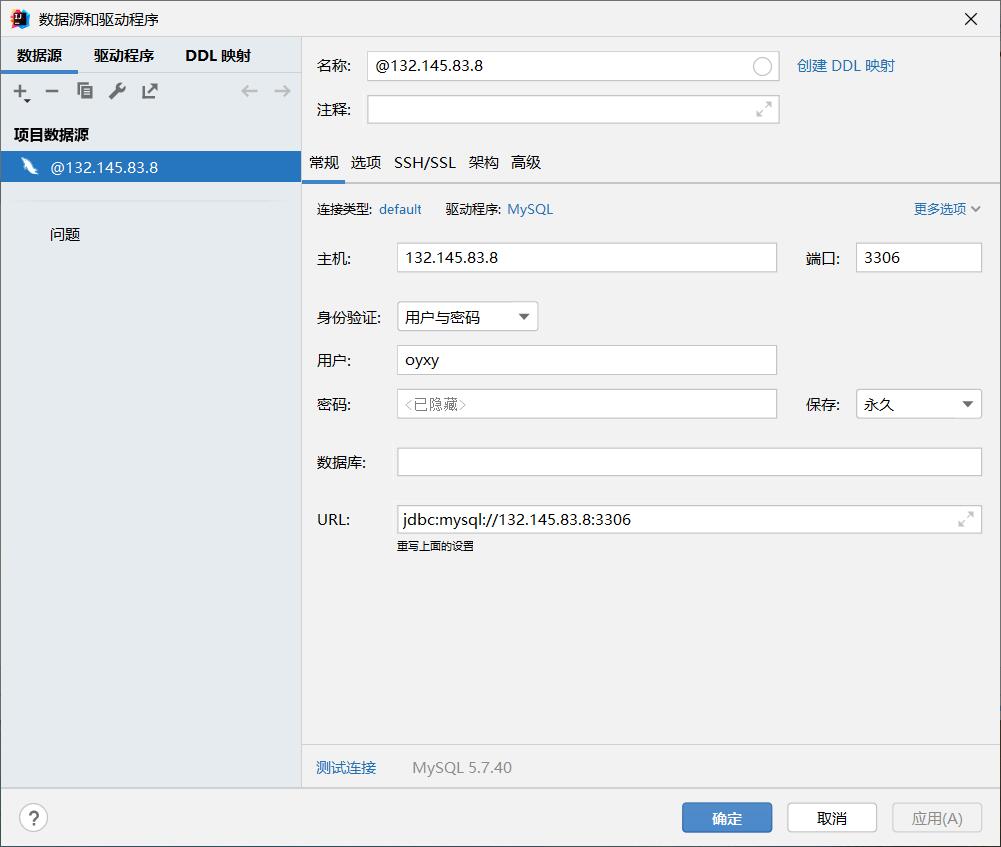
注:【数据库】那里不能填,填了会连不上

